

 Quick start
# Introduction
CKEditor 5 can provide any WYSIWYG editor type. From online editors similar to Google Docs and Medium, to Slack or Twitter like applications, the CKEditor 5 editing framework provides solutions for every user, both customized and out-of-the-box. This modern JavaScript rich text editor with MVC architecture, custom data model and virtual DOM was written from scratch in ES6 with excellent webpack support.
In this guide, you will learn how to run your own CKEditor 5 instance. Below you can find two unique paths describing the installation process. Choose one (or both!) and start your CKEditor 5 journey!
Available paths:
- Online builder path – The most beginners-friendly and quickest path.
- Building from the source path – An advanced path including using
npmand webpack.
# Creating custom builds with online builder
Although the CKEditor 5 WYSIWYG editor comes with handy predefined builds, sometimes these predefined bundled versions are not enough and a need for more customized builds arises. Some of the reasons for creating custom builds are:
- Adding plugin-driven features which are not included in the existing builds.
- Removing unnecessary features present in a build.
- Designing a customized toolbar experience.
- Changing the editor type build.
- Changing the localization language of the editor.
This is where the online builder comes to help you.
The online builder is an application that lets you design and download custom CKEditor 5 builds. It allows you to create your own bundles with your desired editor type, toolbar and set of plugins in a few easy steps, through a simple and intuitive UI.
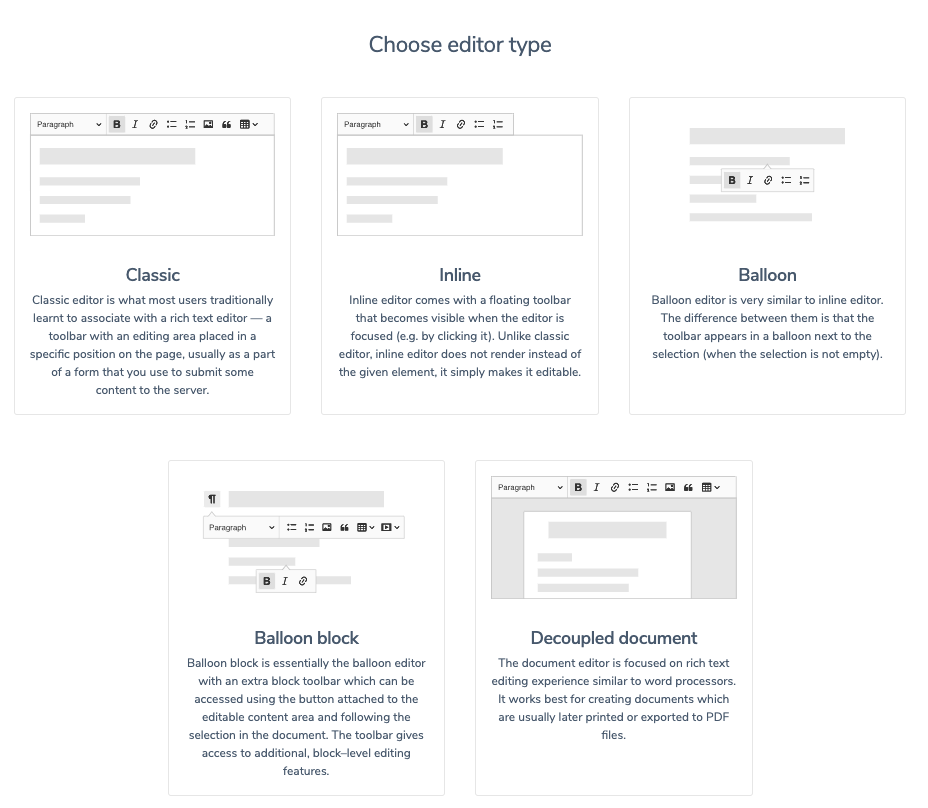
# Choosing the editor type
The following editor types are currently available to choose from:
Refer to the predefined builds documentation and examples to check what kind of WYSIWYG editor suits your needs best. Once you choose the desired editor type, select it to move to the next step.
For the sake of clarity, this guide will use the classic build as an example.
# Choosing plugins
The basic build comes with a predefined set of plugins grouped in a bar at the top of the page. Take a moment to check these options out. You can freely remove the ones that will not be used in your build.

Below the top bar with preselected plugins you will find a large collection of features that can be added to the custom build. Choose the ones that best suit your needs.
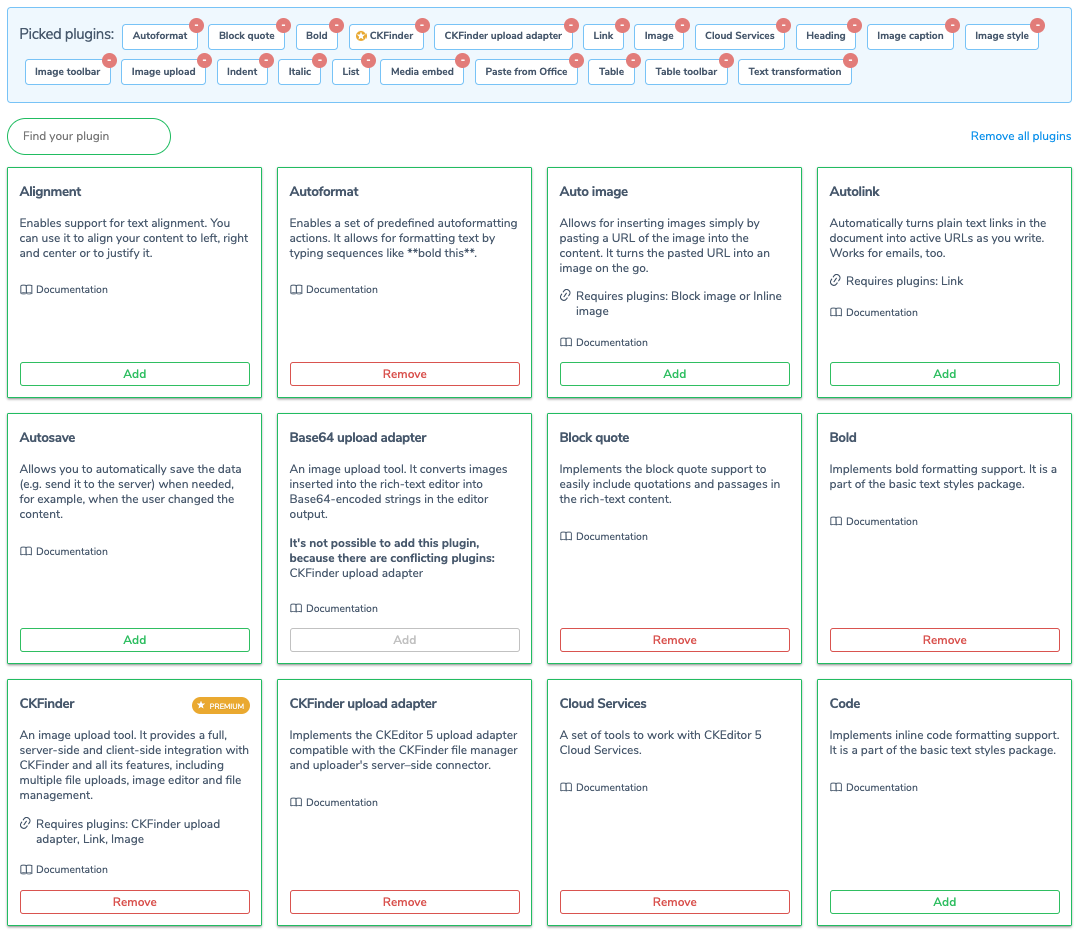
Note that some of the plugins require other plugins to work. These dependencies are mentioned in the Requires plugins section of the description box for each plugin. If this section is not present, the plugin does not need any other plugin to work.
Some of these plugins are premium features which require an additional license to run. They are marked with an appropriate Premium feature badge.
Once you have chosen all the desired plugins, press the Next step button on the top right.
# Toolbar composition
Next step allows you to compose the toolbar. A simple drag-and-drop workspace allows for adding buttons (representing the plugins chosen in the previous step) to the toolbar. You may also change the order of the buttons and dropdowns and group them accordingly. Note that online builder allows you to create a multiline toolbar layout, too — just drag any button below the already placed ones to create a new toolbar line.
Some of the buttons are pre-placed on the layout and thus grayed out in the workspace with available toolbar items. If you want to remove any buttons from your toolbar setup, drag them back to the upper workspace.
Once you finish designing the toolbar, press the Next step button on the top right.
# Choosing the default language
Scroll the list of available languages and check the one you want to be the main language of your editor build.
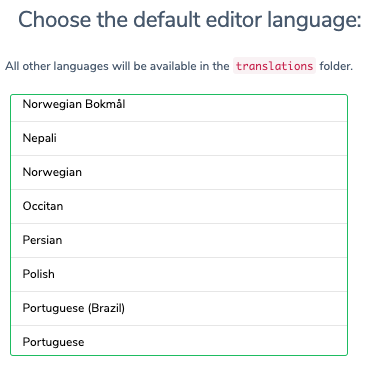
All other languages will still be available in the translations folder.
# Download the customized build
This is as simple as it gets: just press the Start button to download your customized package.
Refer to the What’s next? note at the end of this page for further steps in your CKEditor 5 journey!
# Building the editor from source
This scenario allows you to fully control the building process of CKEditor 5. This means that you will not actually use the builds introduced in the previous path, but instead build CKEditor from source directly into your project. This integration method gives you full control over which features will be included and how webpack will be configured.
This is an advanced path that assumes that you are familiar with npm and your project uses npm already. If not, see the npm documentation or call npm init in an empty directory and check the result.
# Setting up the environment
Before moving to the integration, you need to prepare three files that will be filled with code presented in this guide. Create the webpack.config.js, app.js and index.html files.
Then, install packages needed to build CKEditor 5:
The minimal webpack configuration needed to enable building CKEditor 5 is:
If you cannot use the latest webpack (at the moment of writing this guide, it is 5), the provided configuration will also work with webpack 4.
# Creating an editor
You can now install some of the CKEditor 5 Framework packages which will allow you to initialize a simple rich-text editor. Keep in mind, however, that all packages (excluding @ckeditor/ckeditor5-dev-*) must have the same version as the base editor package.
You can start with the classic editor with a small set of features.
Based on these packages you can create a simple application.
This guide is using the ES6 modules syntax. If you are not familiar with it, check out this article.
Note that in this guide, the editor class is used directly (i.e. you use @ckeditor/ckeditor5-editor-classic instead of @ckeditor/ckeditor5-build-classic).
No predefined editor builds are used, because adding new plugins to these requires rebuilding them anyway. This can be done by customizing a build or by including the CKEditor 5 source into your application (like in this guide).
You can now run webpack to build the application. To do that, call the webpack executable:
You can also install webpack-cli globally (using npm install -g) and run it via a globally available webpack.
Alternatively, you can add it as an npm script:
And use it with:
npm adds ./node_modules/.bin/ to the PATH automatically, so in this case you do not need to install webpack-cli globally.
Use webpack --mode production if you want to build a minified and optimized application. Learn more about it in the webpack documentation.
Note: Prior to version 1.2.7, uglifyjs-webpack-plugin (the default minifier used by webpack) had a bug which caused webpack to crash with the following error: TypeError: Assignment to constant variable. If you experienced this error, make sure that your node_modules contain an up-to-date version of this package (and that webpack uses this version).
Note: CKEditor 5 builds use Terser instead of uglifyjs-webpack-plugin because the latter one seems to no longer be supported.
If everything worked correctly, you should see:
# Running the editor
Finally, it is time to create an HTML page:
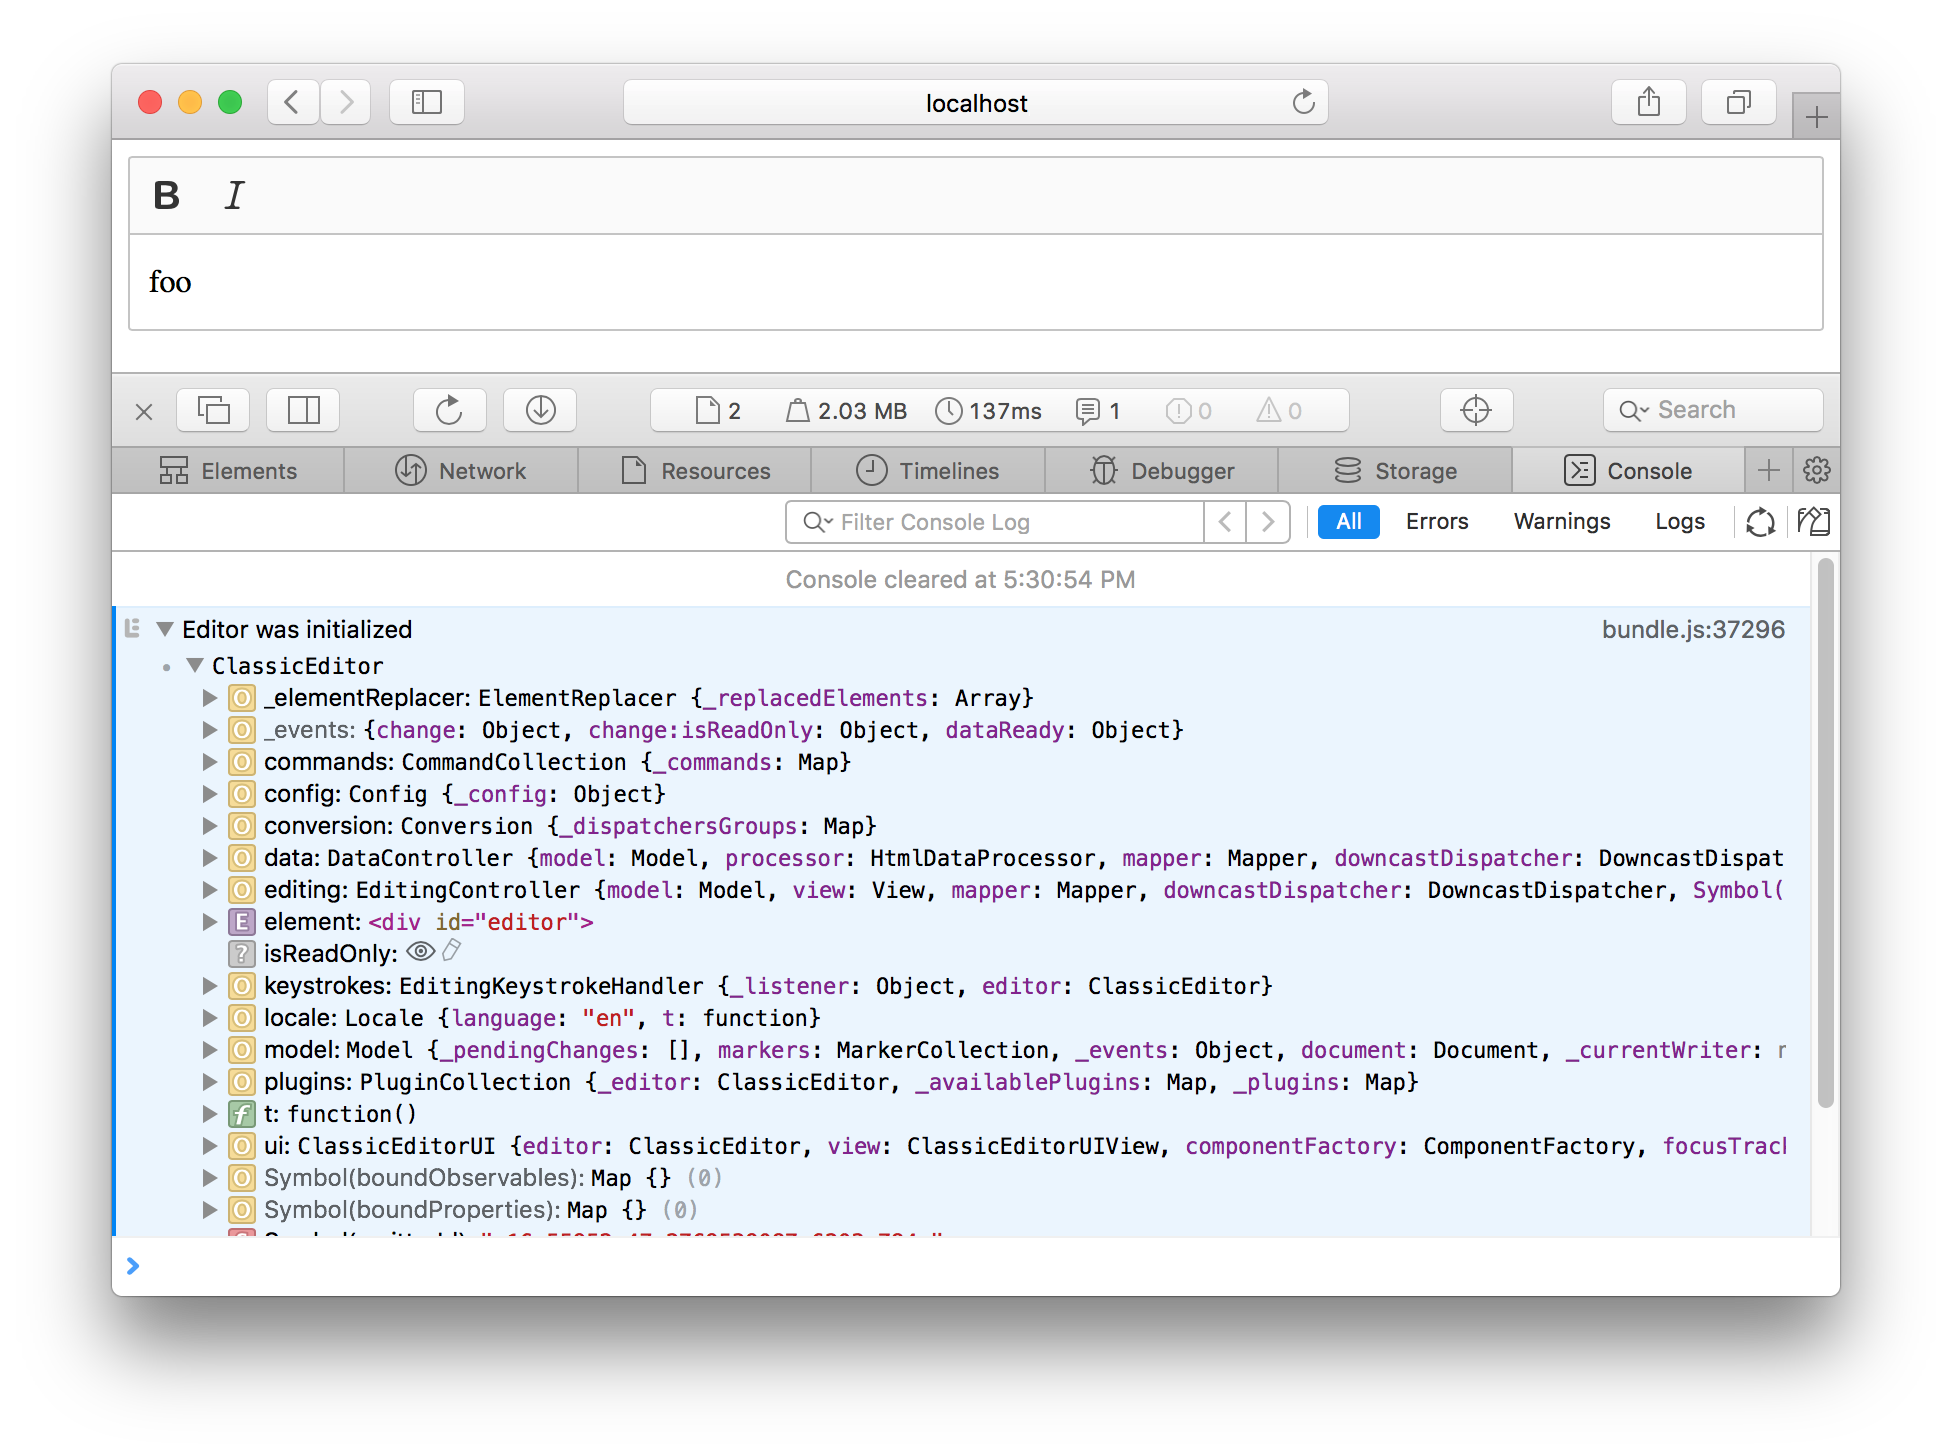
Open this page in your browser and you should see the simple WYSIWYG editor up and running. Make sure to check the browser console in case anything seems wrong.
We recommend using the official CKEditor 5 inspector for development and debugging. It will give you tons of useful information about the state of the editor such as internal data structures, selection, commands, and many more.
What’s next?
Congratulations, you have just run your first CKEditor 5 instance! Now it is time to learn more about customization, so jump in straight to the Configuration guide.
P.S. If you use Angular, React or Vue.js and want to integrate CKEditor 5 in your application, refer to the Frameworks section.
Every day, we work hard to keep our documentation complete. Have you spotted an outdated information? Is something missing? Please report it via our issue tracker.